Remote Access Mac File System from iOS/iPad
In this post, you will learn how to remotely access the Mac file system or shared folders from your iPad/iOS.
This can be achieved in two steps:
- Enabling native File Sharing on Mac
- Establishing a Tailnet Network
Enabling File Sharing
Mac allows users to share files and folders with others on the same network. You can share your entire Mac with everyone or allow specific users access to only certain folders, provided they are on the same network.Here is how to enable file sharing on Mac.
- Lauch the System Settings
- Go to General > Sharing
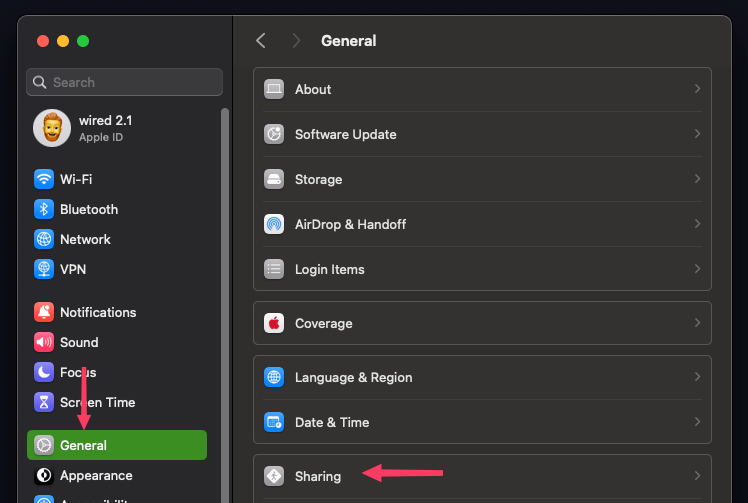
- Toggle on File Sharing
- Click on the i info button on the right
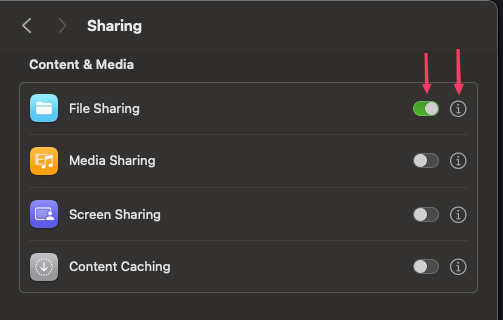
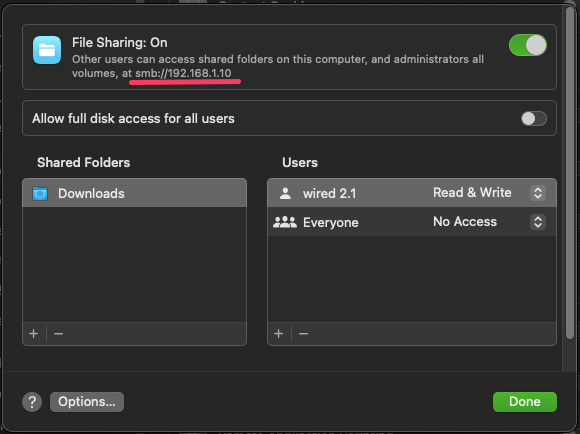
- A new window will pop up. Turn File Sharing On
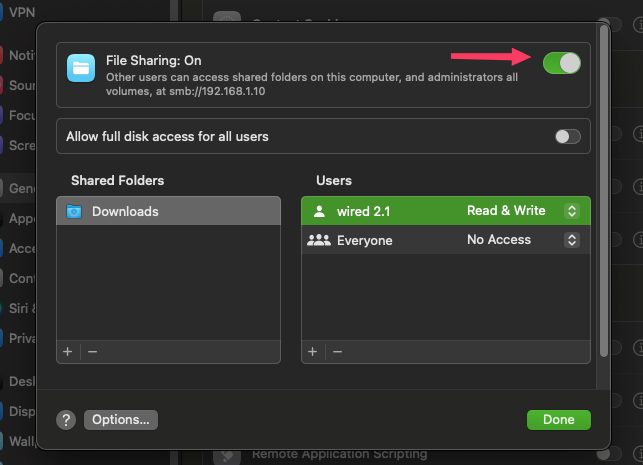
You will notice two distinct areas in the same window - Shared Folders and Users. For each section, there is + - icons provided at bottom-left corner. The Shared Folders area list the folders that are ready to be served for sharing. It is similar to staging area in git.
While as, the Users column on the right list the users who are granted the access permission for the selected folder on the left. The plus (+) and minus (-) icons can be used to stage new folders for sharing or to add the user (main, staff, everyone) for access.
In my case there is only one user ‘wired 2.1’ which I use to login into my Mac. There is also a drop down menu to control the read & write permissions for any given user.
- Next, click on Options at the bottom-left and a new window will pop up
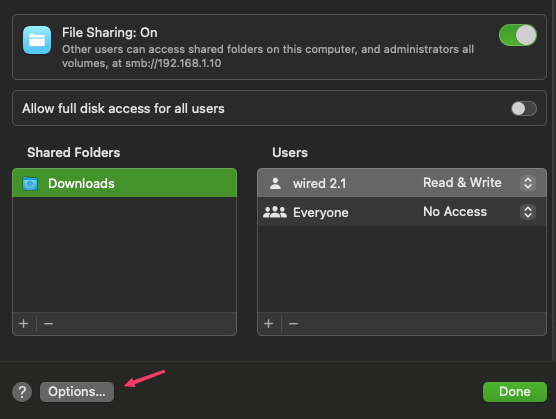
- Make sure Share files and folder using SMB is enabled
- Click on Done

The window will close and you will see a private IP address with smb protocol initial at the top. Take note of this as we will need this.
Accessing with iPad
Now that you got the File Sharing enabled on Mac, you can access the shared folder from iOS default Files app or any third party app that supports smb protocol. Note that both devices should be connected to the same network.
I am going with default Files app so here is how to connect to Mac file system from iPad/iOS device using SMB protocol:
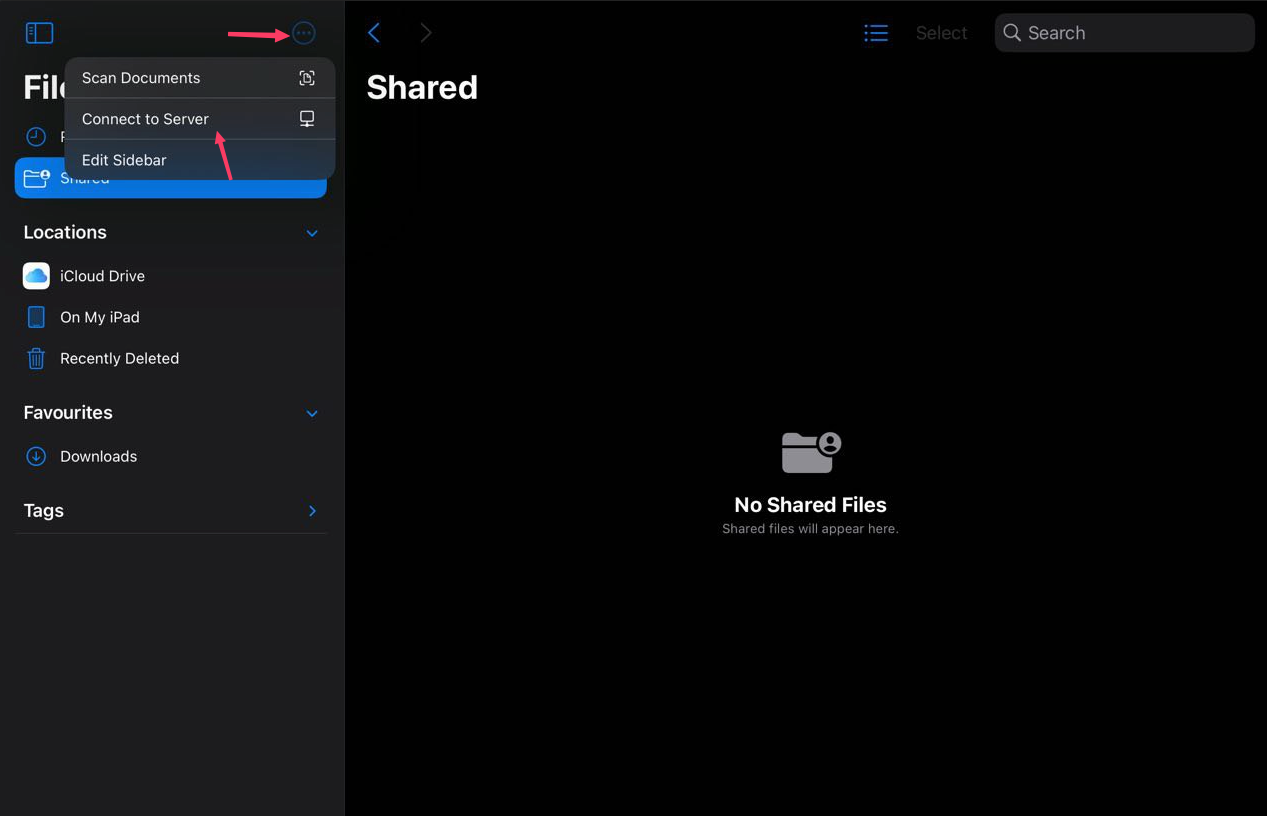
- Launch the Files app
- Click on three dots at the top
- Select Connect Server
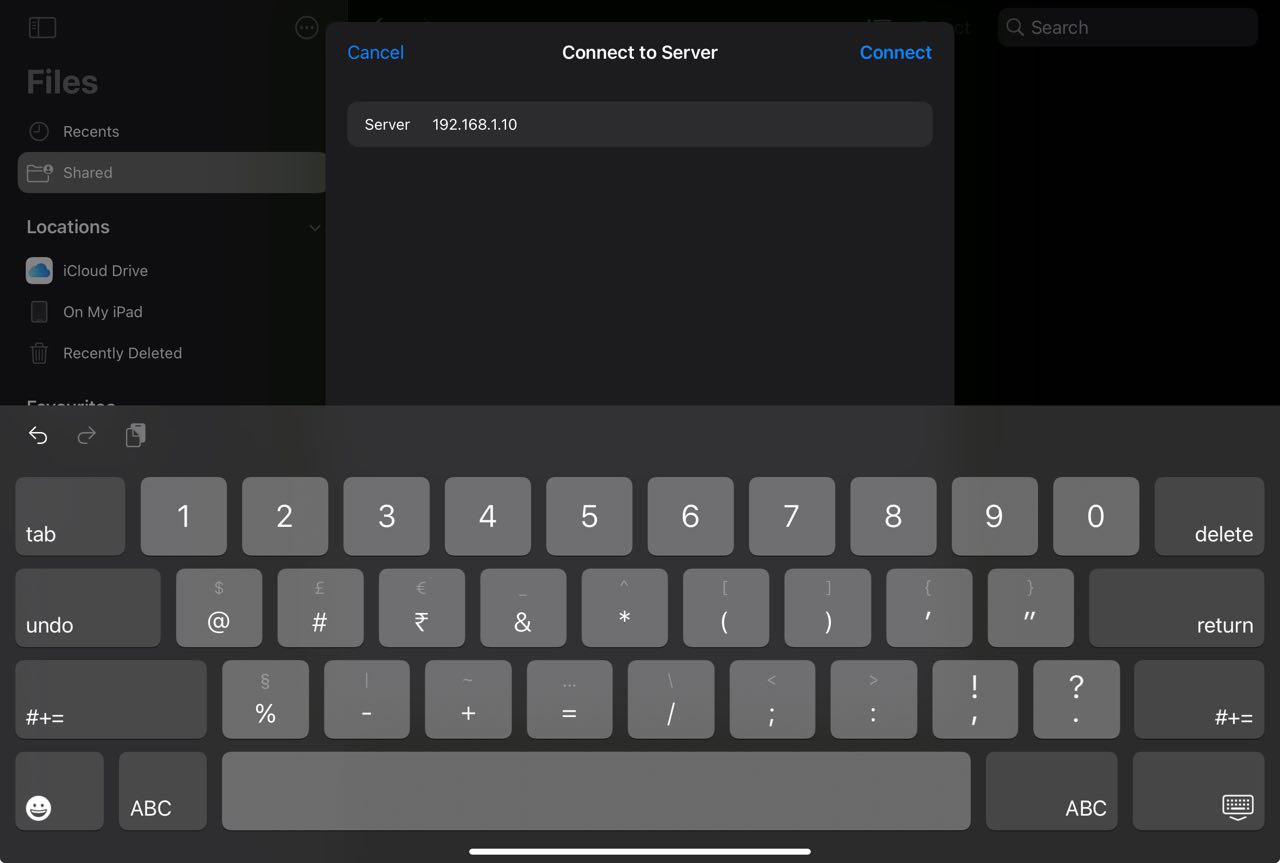
Type the IP address that you previously got from the File sharing window on Mac with smb initial and click on connect.
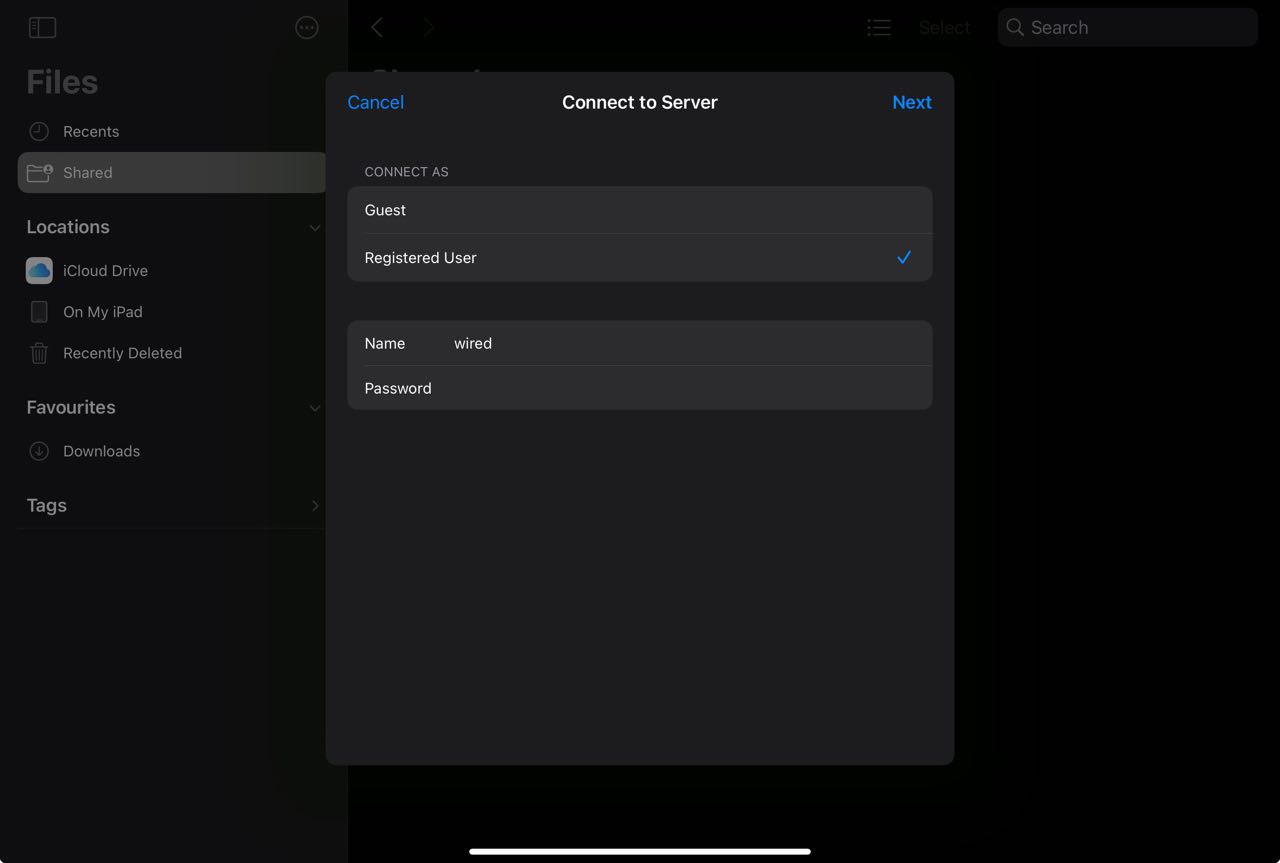
- On the next page, select Registered User
- Fill in username of your Mac user account in Name field (Run
whoamiin terminal to know your username) - Fill in Password of your Mac user account in Password field and click on Next
It will mount the Mac file system in your Files app and you will be able to access your shared folder(s) from your iOS/iPad.
That is how we can access the Mac file system when both our Mac & iOS/iPad are connected to same network. However, once we are outside of our home network the files won’t be accessible because the private IP can’t be reached out outside the network.
That is exactly where Tailscale helps us. For those who don’t know Tailscale is a service that makes the devices and applications you own accessible anywhere in the world, securely and effortlessly.
Establishing a Tailnet Network
You need to have tailscale installed both on your Mac & iOS/iPad. You can download the app for you specific OS here. Install, authorize your account and make sure both devices show connected on admin console.

Note the tailnet IP allocated to Mac by the new network created using Tailscale.
Once you have both device connected with Tailscale, launch Files app on your iOS > three dots menu > connect to server > Put tailnet IP of Mac > Registered User > Your Mac user and password > Click on Next.
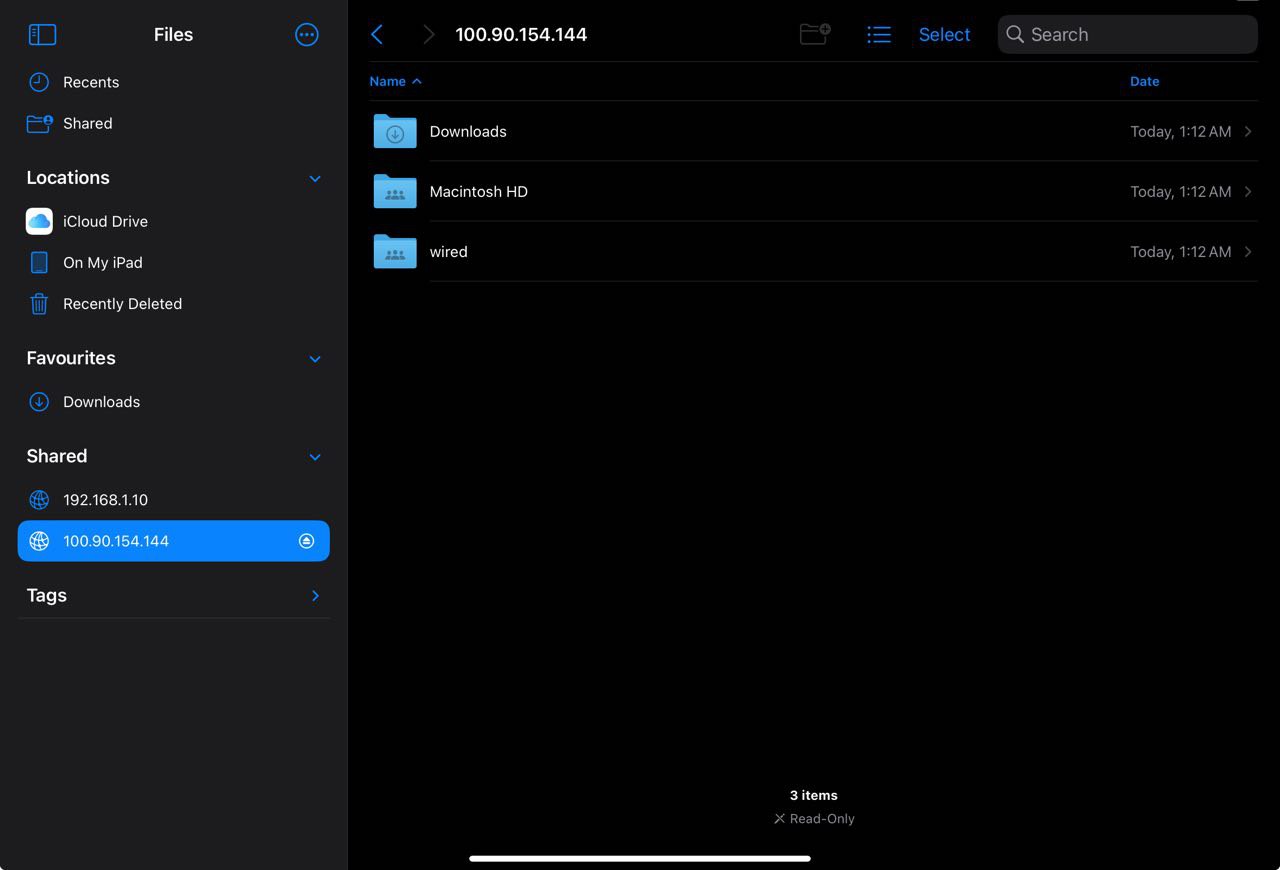
You will be in. Now, with Tailscale Network established, if you switch you iOS device to different network the Mac file system will still be accesible from anywhere as long as your Mac is up and connected with Tailnet.
Closing Thoughts
That is how we can access our Mac file system remotely using iOS/iPad with the help of Tailscale. This is my second post on Tailscale showcasing its versatile usecase. Previously I wrote a post on how we can create a VPN with the help of Tailscale and Ubuntu server.
If you found this post useful consider sharing it with friends & subscribe using RSS or Telegram.
Reply via [mail](mailto:[email protected]?subject=📝 Response to blog post)