Generating SSH Keys for Remote Login
Table of Contents
- Table of Contents
- what is ssh
- understanding ssh-keygen
- generating keys
- copy key to server
- login into remote server
- working
what is ssh
SSH, or Secure Shell, is a cryptographic network protocol used for secure remote login and data communication. It provides a secure way to access and manage remote systems over an unsecured network, such as the internet.
SSH uses public key cryptography to authenticate and establish a secure connection between a client (your computer) and a server (the remote system you want to access). SSH is actually preferred over the password based authentication for better security & convenience.
Every DevOps engineer or Sysadmin get to login into remote servers every now & then. Even the cloud providers recommend SSH connection over any other method.
understanding ssh-keygen
ssh-keygen is a utility to generate SSH keys. It comes preinstalled on *nix based OS like Ubuntu or macOS. It is quite easy to setup ssh-keygen on Windows as well.
You can read its man page by running
man ssh-keygen
Assuming you are running on unix based OS, use space key to scroll throw the man page & hit q to close the manpage.
generating keys
First, we will generate a key pair on local machine. This key pair consists of a public & a private key. The private key should be kept secure andd never shared, while public key can be freey distribute. There are two ways to generate keys using ssh-keygen utility
- Default : No arguments are fed to the keygen
- Custom : Arguments are defined with key generator
default method
Launch your terminal & fire this command:
ssh-keygen
The above command will prompt for the following options:
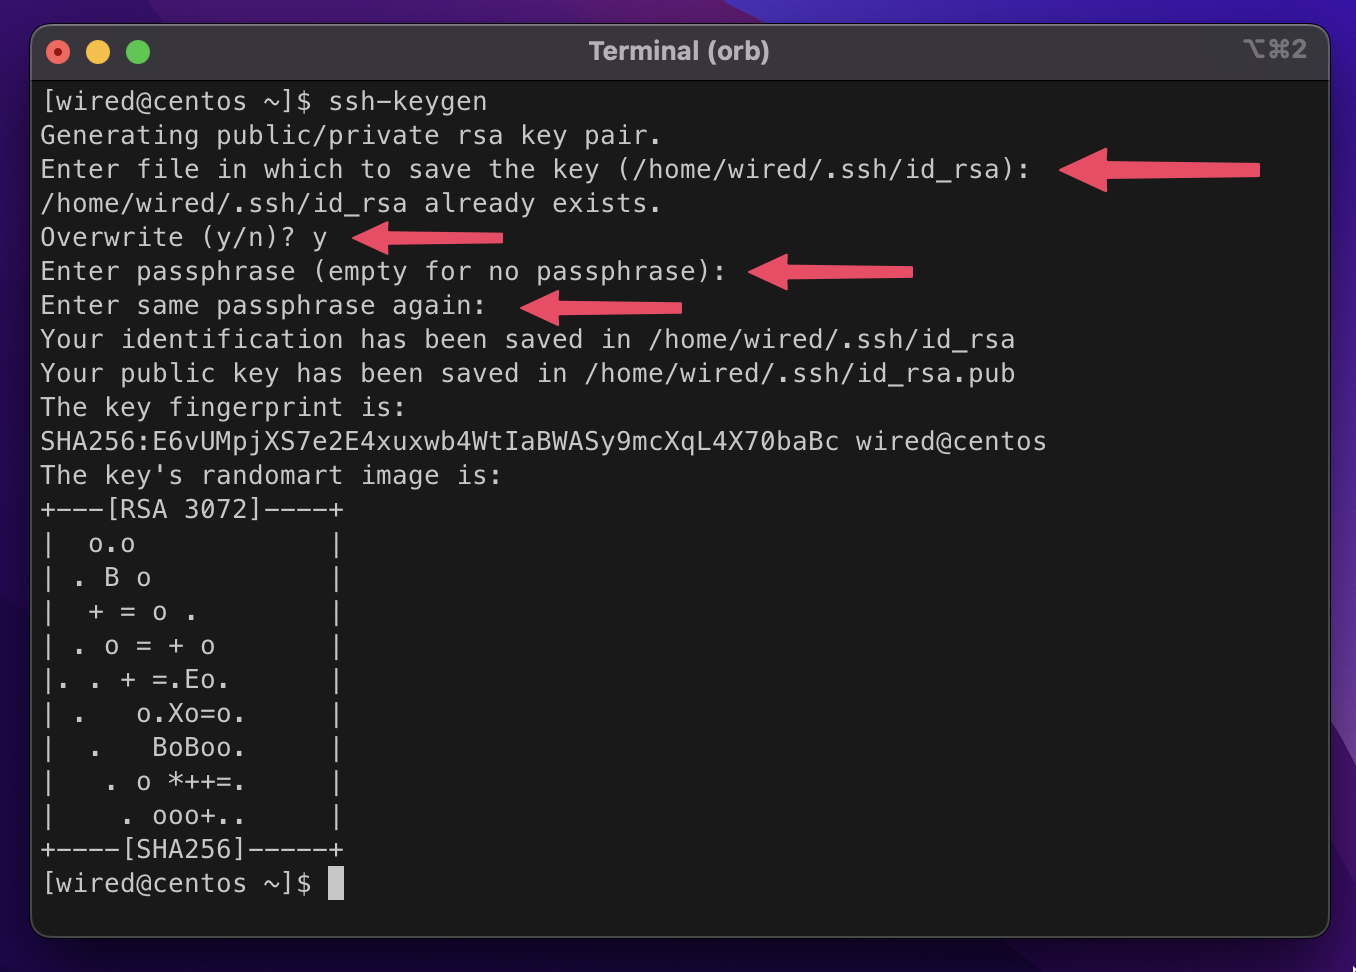
- Enter file in which to save the key: Location in the local machine where generated key pair is to be saved – Hit enter to save in default location.
- home/user/.ssh/rsa_id: If the keys already exist at the location it will prompt you whether to overwrite them or not. If you ain’t using the existing pair anywhere feel free to replace them.
- Enter passphrase: The passphrase is used for encrypting the private key, so that it cannot be used even if someone obtains the private key file. If you use passphrase make sure to note it down somewhere safe because you will need it. You can also choose to leave it empty by simply hitting enter.
The keys will be generated & saved into the destined location, which by default is /home/$USER/.ssh/. Run ls ~/.ssh/ to list the generated keys:
$ ls ~/.ssh
-rw-------  1 wired  staff   2602 Aug 23 22:18 id_rsa
-rw-r--r--  1 wired  staff    566 Aug 23 22:18 id_rsa.pub
The id_rsa.pub is the public key which you can share freely & the one without extension is your private key, which is to be secured and kept private.
custom method
Lets look into an example ssh-keygen command to generate SSH keys with custom options:
ssh-keygen -t rsa -f ~/.ssh/ssh-key -b 4096 -q -P "mysecret"
- -t : is used to select algorithm used in keygen. The options available are rsa (recommended), dsa, ecdsa, ed25519.
- -f : Normally, the keygen prompts for the file in which to store the key. However, it can also be specified on the command line using the -f
option. - -b : is used to define the no of bits used in keys. For rsa atleast 2048 is recommended, 4096 is even better.
- -v : verbose, display output.
- -q : silence key-gen, opposite to verbose.
- -p : Set or change the passphrase of a private key file.
- -N : to leave passphrase empty for e.g
ssh-keygen -t rsa -f ~/.ssh/ssh-key -b 4096 -q -N ""
You can locate the generated keys at ~/.ssh/
$ ls ~/.ssh/

ssh-key (private key)
ssh-key.pub (public key)
copy key to server
Now in order to login to a remote server you need to copy your public key to the ~/.ssh/authorized_keys directory of the remote server. Once the key has been authorized for SSH, it grants access to the server without a password.
Use the below command to copy SSH key:
ssh-copy-id -i ~/.ssh/ssh-key.pub user@host
where the user is the username of the host server and the host can be the domain name or the IP of the server.
This logs into the server host, and copies keys to the server, and configures them to grant access by adding them to the authorized_keys file. The copying may ask for a password or other authentication for the server.
login into remote server
Once you have copied the public key successfully to the remote server, you can simply login into the server by running:
$ ssh -i ~/.ssh/ssh-key user@host
The login should now complete without asking for a password. Note, however, that the command might ask for the passphrase you specified for the key.
The most common reason why login attempt might fail is the permission privileges. Make sure /etc/ssh/sshd_config on the server contains PubkeyAuthentication yes. Remember to restart the sshd process on the server.
working
When you try to connect to the remote server, your local SSH client sends a request to authenticate using your private key. The remote server receives the authentication request and checks if the corresponding public key is stored in the authorized_keys file for your user. If it finds a match, it generates a challenge for your local SSH client.
Your local SSH client uses your private key to sign the challenge generated by the remote server. This creates a digital signature that proves you possess the corresponding private key. The remote server verifies the digital signature using your public key. If the verification is successful, it confirms that you possess the private key and allows you to establish a secure connection.
By using public key cryptography, SSH ensures that only those with the corresponding private key can authenticate and access the remote server. This method eliminates the need to transmit passwords over the network, providing a more secure and convenient way to connect remotely.
That is all for today. If you found this post useful, consider sharing it with friends. See you next time :)
Reply via mail